Install RobOS
Flash a USB drive, boot, and walk into a fully provisioned AI development desktop.
Table of contents
- Watch: RobOS Installer Walkthrough
- Option A: Install on a Laptop (Bare Metal)
- Option B: Run as a VM (QEMU/KVM)
- What Gets Installed
Watch: RobOS Installer Walkthrough
Option A: Install on a Laptop (Bare Metal)
The recommended way to run RobOS for daily use. Works on any x86_64 machine — ThinkPads, Dell, HP, any PC.
Step 1 — Download the RobOS Installer
Download the RobOS Installer for your current OS from the latest GitHub Release:
| Your OS | Download |
|---|---|
| Linux | RobOS-Installer-linux.AppImage or .deb |
| macOS | RobOS-Installer-mac.dmg |
| Windows | RobOS-Installer-win.exe |
Step 2 — Flash the USB Drive
Run the installer and follow the 3-step wizard:
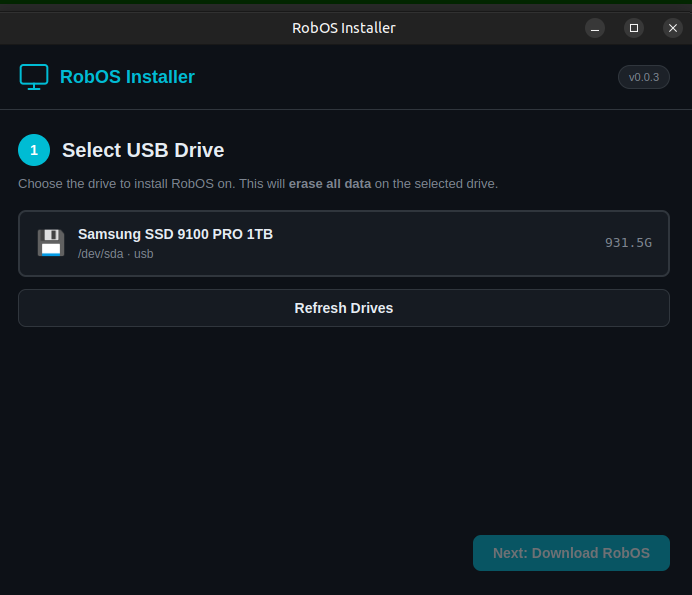
- Select your USB drive — the installer detects all removable drives
- Download RobOS — automatically downloads the latest ISO with a progress bar
- Flash — writes the ISO to your USB drive (confirm before erasing)
This will erase the target drive. Double-check you’re writing to the USB drive, not your system disk.
The Manual Way: Flash with dd / Rufus
# Download the ISO
wget https://github.com/nddipiazza/robos/releases/latest/download/robos-v0.0.3.iso

# Linux — flash with dd
sudo dd if=robos-v0.0.3.iso of=/dev/sdX bs=4M status=progress

# Or use the included CLI tool
sudo bash scripts/flash-robos.sh /dev/sdX
On macOS use balenaEtcher. On Windows use Rufus.
Step 3 — Boot and Provision
- Insert the USB drive and boot from it (F12 or F2 at BIOS splash for boot menu)
- The RobOS installer starts automatically — no interaction needed
- Ubuntu 24.04, GNOME, Node.js, Electron, and all 30+ RobOS apps install and configure themselves
- After ~15–20 minutes you’ll see the RobOS desktop
Default credentials: username robos, password robos
The installer will use the entire disk. If you need dual-boot or custom partitioning, use Option B (VM) or install Ubuntu manually first, then run
robos-provision.shfrom the release.
Option B: Run as a VM (QEMU/KVM)
Best for trying RobOS before committing to bare metal, or for development on the RobOS platform itself.
See the full VM setup instructions in Getting Started.
What Gets Installed
The provisioning sequence runs 7 steps automatically:
- System packages (build tools, Node.js 20, npm)
- GNOME desktop + LightDM auto-login
- Electron + all 30+ RobOS apps installed to
/usr/local/share/robos/ - Dark navy/cyan theme applied
- Desktop shell, launchers, and
.desktopentries registered - SSH keys generated, zsh + oh-my-zsh configured
- Final reboot into the RobOS desktop